
Download Sessions via Script
Use this script when downloading many imaging sessions from CNDA. It's designed for large downloads that would be cumbersome through the web browser — it logs into CNDA for you, downloads each session as a .zip, skips anything it already downloaded, retries a failed download once automatically, and keeps a log of everything it did. Each session is downloaded as a ZIP archive containing the files stored in CNDA for that session.
Before You Begin
You'll need:
- A CNDA account with access to the project you want to download.
- The project ID (for example
MRF_1234), or a CSV listing the specific sessions you want. - Enough free disk space — roughly twice the size of the data you're downloading (temporary ZIPs, plus extracted data if you unzip them afterward).
Instructions
If you only need a few sessions, use Downloading Sessions From CNDA instead — it's faster for a small number of sessions and doesn't require any of the setup below.
Download the script file: cndaBulkDownload.txt. Right-click the link and choose Save link as..., then save it somewhere you'll remember — your Desktop or Documents folder works well. The file is provided as
.txtbecause browsers often flag.shfiles as potentially harmful and block the download. Once it's saved, open the file and use Save As to save a copy of it named exactly:cndaBulkDownload.shMake sure Windows doesn't save it as
cndaBulkDownload.sh.txt— some versions of Windows hide file extensions by default, so it's easy to end up with.sh.txtwithout realizing it. If you're not sure, turn on "File name extensions" in File Explorer's View tab so you can see the full name before continuing.As an alternative, you might also be able to copy the content of the script into a Notepad and save it as cndaBulkDownload.sh. The main point is the file should be a shell script format after renaming not in the format of a txt file.
Install Git Bash (Windows only, one-time setup). This gives Windows the command-line tools (
bash,curl) the script needs, which aren't included by default.- Go to https://git-scm.com/download/win — the download starts automatically. If it doesn't, click the "Click here to download" link on that page.
- Once downloaded, double-click the installer file (something like
Git-2.xx.x-64-bit.exe) to run it. - Windows may show a "Do you want to allow this app to make changes to your device?" prompt — click Yes.
- Click through the installer screens. The default settings on every screen are fine for this script — just click Next on each one, then Install on the final screen.
- When it finishes, click Finish.
If your team already has WSL (Windows Subsystem for Linux) set up on your machine, you can use that instead of Git Bash — open your Linux distro from the Start menu and follow the same steps below. If you're not sure whether you have WSL, Git Bash is faster to get running and is all this script needs.
Open a command line.
- Windows: click the Start menu, type
Git Bash, and click Git Bash in the results. A dark window with a text prompt opens — this is your command line for every step below. - Mac: press Cmd + Space, type
Terminal, and press Enter. - Linux: open your distro's terminal application from your applications menu.
- Windows: click the Start menu, type
Go to the folder where you saved the script. Type
cdfollowed by the folder path and then hit Enter. For example, if you saved it to your Desktop:cd ~/Desktopor if you saved it to Documents:
cd ~/DocumentsIn Git Bash,
~always means your Windows user folder (C:\Users\yourname), so~/Desktopand~/Documentswork the same way they do on Mac and Linux. If you saved the script somewhere else, like a Downloads folder or a specific project folder, use that path instead — for examplecd ~/Downloadsorcd "/c/Users/yourname/My Folder". You can also typecd(with a trailing space) and then drag the folder from File Explorer directly into the Git Bash window — it will fill in the correct path for you automatically.Confirm the script is actually there before continuing:
ls cndaBulkDownload.shIf it prints back
cndaBulkDownload.sh, you're in the right folder. If you instead seeNo such file or directory, you're either in the wrong folder or the file didn't save with that exact name — check step 5 and step 2 again.Give the script permission to run. Mac, Linux, and Git Bash all treat downloaded scripts as non-executable by default as a safety measure, so this tells your system it's okay to run this one. It's a one-time step per copy of the script:
chmod +x cndaBulkDownload.shYou won't see any output from this — that's expected. You don't need to repeat it the next time you use the same copy of the script.
Run the script. You have two ways to tell it what to download:
Download an entire project
./cndaBulkDownload.sh -u yourUsername -p MRF_1234Replace
yourUsernamewith your CNDA username andMRF_1234with the actual project ID. You'll be prompted to type your CNDA password — it won't show anything on screen as you type, not even dots. This is normal terminal behavior, not a freeze. Type it and press Enter.Download a specific list of sessions
Create a CSV file listing the sessions first — see Session List CSV Format below — then run:
./cndaBulkDownload.sh -u yourUsername -s mysessions.csvUse one or the other, not both — the script will stop with an error if you pass
-pand-stogether.Large projects may take hours to complete depending on your internet connection and the amount of data involved. The script prints progress as it downloads each session, so as long as you see new lines appearing, it's still working.
(Optional) Choose where files are saved. By default, downloads go into a new folder named after the project (or
cnda_downloadsif you used a session list), created inside whatever folder you were in when you ran the script. To pick your own folder instead, add-d:
./cndaBulkDownload.sh -u yourUsername -p MRF_1234 -d /path/to/my/folder
- Recommended for any download over ~25 minutes: save your credentials to a file instead of typing your password with
-u. CNDA logins expire every 30 minutes, and the script automatically re-logs in for you around the 25-minute mark — without a creds file, that re-login will stop and prompt you for your password again mid-download, which can silently pause an unattended run. See How Interruptions Are Handled for details.- In the same folder as the script, create a plain text file named
creds.jsoncontaining exactly this, with your own username and password:{"user": "yourUsername", "password": "yourPassword"} - Run the script with
-cinstead of-u:./cndaBulkDownload.sh -c creds.json -p MRF_1234
chmod 600 creds.json), never commit it to Git, never email it, and delete it when you're done with it. Do not use-uand-ctogether — the username comes from the file. - In the same folder as the script, create a plain text file named
Complete Example
Putting it all together, downloading a whole project on Mac or Linux looks like this from start to finish:
cd ~/Desktop
chmod +x cndaBulkDownload.sh
./cndaBulkDownload.sh -u jsmith -p MRF_1234
Session List CSV Format
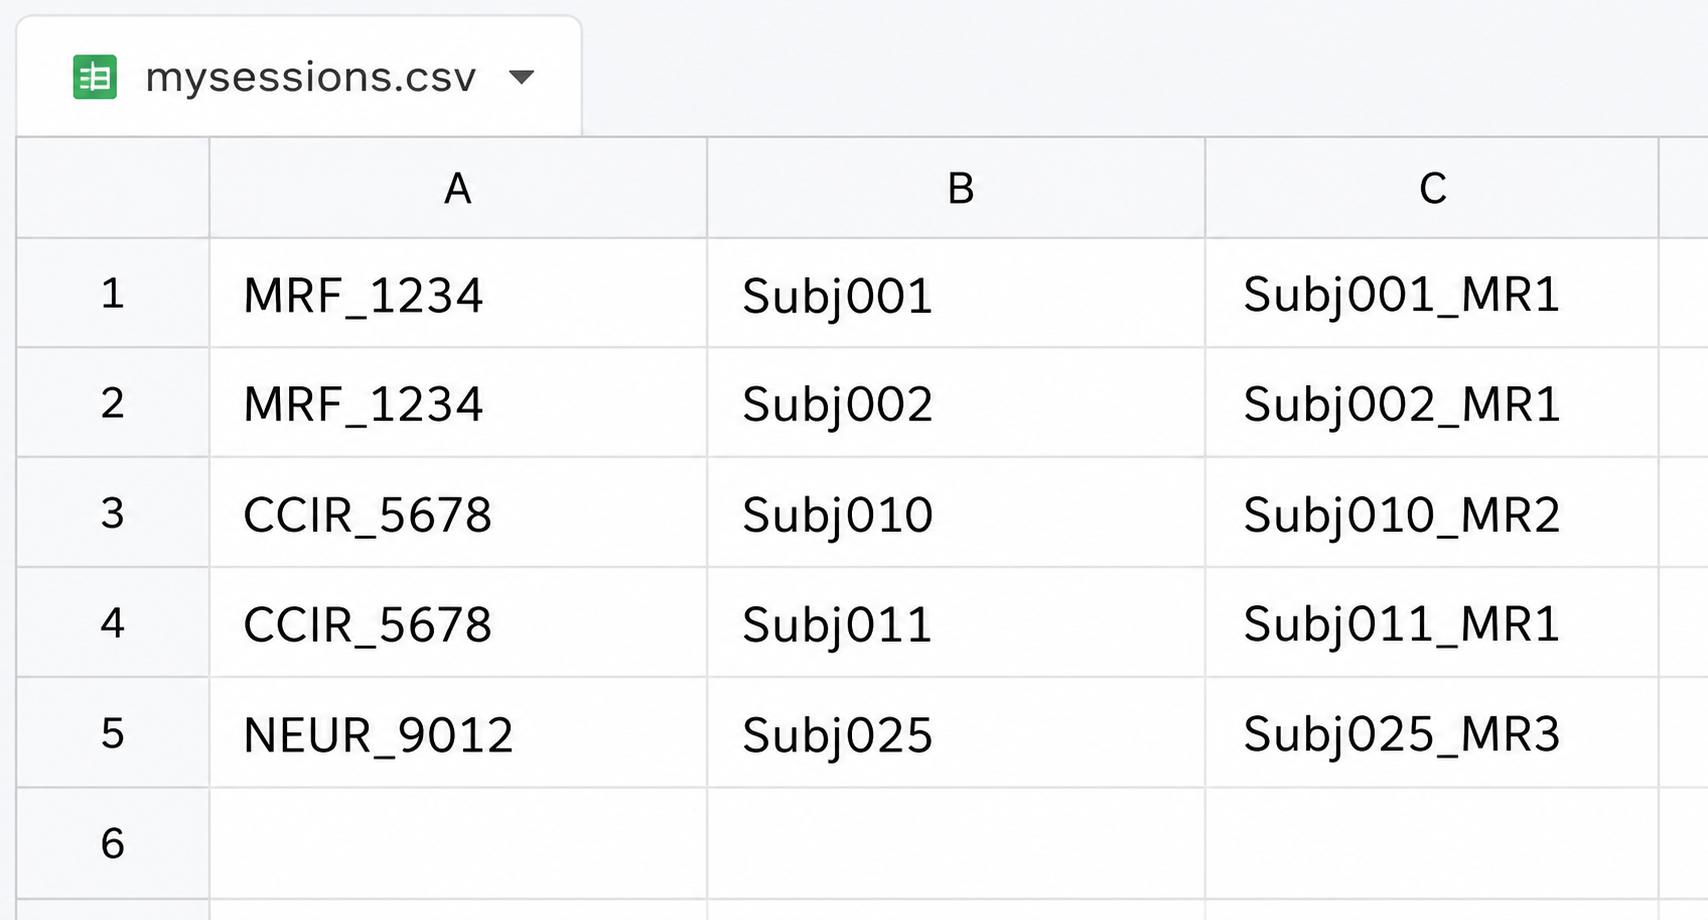
If you're downloading specific sessions instead of a whole project, create a plain CSV file — you can build this in Excel and use Save As → CSV, or write it directly in a plain text editor. No header row — just one session per line, in this order: Project,Subject,Session
File: mysessions.csv
MRF_1234,Subj001,Subj001_MR1
MRF_1234,Subj002,Subj002_MR1
CCIR_5678,Subj010,Subj010_MR2
Here's what that looks like opened in a spreadsheet — no header row, just three columns:
What Happens While It Runs
You'll see output scroll by that looks like this:
[1]
Downloading Subj001_MR1 (MRF_1234/Subj001)...
[2]
Subj002_MR1.zip already exists, skipping
When it finishes, you'll see a summary line:
Done. OK=42  FAIL=1  SKIP=3
See /path/to/logs/cndaBulkDownload_20260803_143000.log for details.
- OK — successfully downloaded.
- SKIP — already downloaded in a previous run; left alone.
- FAIL — something went wrong with that specific session. Open the log file named in that line for details on exactly which session and why.
The log records every session downloaded, skipped, or failed, along with any error messages returned by CNDA — it's the first place to look if something goes wrong.
Note: if anything fails, it's almost always safe to just run the exact same command again. The script automatically skips everything it already downloaded successfully, so a rerun only retries what actually failed.
How Interruptions Are Handled
The script is built to survive network hiccups, expired logins, and partial failures without losing progress or corrupting your downloads.
Partial downloads never count as finished. Each session downloads first to a temporary .part file. Only after the script confirms it's a valid ZIP archive does it rename the file to its final .zip name. If the download is interrupted for any reason — closed terminal, lost network connection, killed process — you're left with a .part file, not a broken .zip, so a later rerun won't mistake it for a completed download and skip it.
Failed downloads retry automatically, once. If a download fails or comes back invalid, the script re-authenticates and tries that one session again before giving up and marking it FAIL in the log.
Your login is refreshed automatically during long runs. CNDA logins expire after 30 minutes. Rather than waiting for a download to fail and then recovering, the script checks the age of its login before each session and proactively re-logs in once it's been about 25 minutes — before anything actually breaks.
This is why the credentials file matters for anything longer than 25 minutes. If you started the script with -u (typing your password), that automatic re-login has no password to use and will stop and prompt you to type it again, right there in the terminal — meaning an unattended long download can silently pause and wait for you. If you used -c creds.json instead, the re-login reads your password from the file with no prompt and no interruption. For any download you expect to take more than about 20–25 minutes, use -c creds.json, not -u.
A very slow or stalled connection is caught automatically. If a download's transfer rate drops too low for too long (default: under 1024 bytes/sec for 300 seconds), the script treats it as stuck, aborts that download, and moves on rather than hanging indefinitely. These thresholds can be tuned with the STALL_TIME and STALL_LIMIT environment variables if needed, but the defaults work for most connections.
Troubleshooting
command not found: ./cndaBulkDownload.sh— you're either not in the same folder as the script, or you forgot step 7 (chmod +x). Runls cndaBulkDownload.shto check you're in the right place.Permission denied— you skipped step 7. Runchmod +x cndaBulkDownload.sh, then try again.- "Your access is probably not enabled for this project, or the project id is wrong." — double-check the project ID is typed exactly as it appears in CNDA, and confirm you have access to that project.
- "CNDA login failed. Check your credentials and retry." — your username or password was entered incorrectly. Just run the command again.
- A session fails every time, even after rerunning — check the log file named in the "Done." summary line for the specific reason next to that session.
- You're not sure if you're signed in for too long — CNDA sessions expire automatically after a period of inactivity. The script detects this on its own and re-logs in for you mid-run; you don't need to do anything.